ILS studio designs are based on consultations with schools to determine their needs and goals. These sessions include evaluation of studio space, power requirements and existing video equipment. All ILS studios are capable of producing high quality video projects, however, the most important added value feature is ON-SITE TRAINING for teachers and students with continuing TOLL-FREE phone support. A 20 page illustrated manual for setting up and operating the studio is provided to all studio training participants. In addition to a training guide the manual serves as a reference for specific studio operations. To ensure that all participants gain a practical understanding of studio setup and operation, the training makes no assumptions about participant prior experience or knowledge.
Training Agenda and a list of Training Session Topics:
AGENDA
Morning
- Overview of Studio Components
- Demonstration / Discussion of Studio setup Procedures
- Demonstration / Discussion of Producing, Editing, Broadcasting and Archiving Daily Newscasts
Afternoon: Hands-On Exercises
- Video Editing on the Renommee
- Studio Operation: Produce Edit and Broadcast a News Show
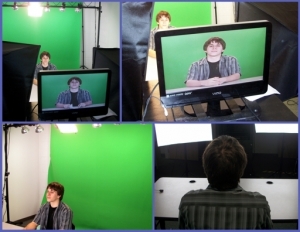
OVERVIEW OF STUDIO COMPONENTS
- Lighting Grid
- Chromakey Screen
- Key and Fill Lights
- Back Light or Hair Light
- Background Lights
- Sets
- Teleprompter
- Broadcast Workstation
- Audio Mixer
- Video Switcher
- Record and Play VCRs
- Preview and Program Monitors
- DVD Player
- Renommee Digital Video Editor
DEMONSTRATION AND DISCUSSION OF STUDIO SETUP PROCEDURES
- How to Calibrate the Studio Reference TV/Monitor
- How to Setup Studio Three-Point Lighting
- How to White Balance the Camcorder
- How to use Warming Cards
- How to Setup Background Lighting
- How to Setup the Studio Audio System
- How to Use Teleprompter Software
- How to Setup and Use the Video Switcher
- How to control lighting for optimal Chromakey Effect
- How to Use Virtual Sets with Chromakey Function
DEMONSTRATION AND DISCUSSION OF PRODUCING, EDITING, BROADCASTING AND
ARCHIVING A NEWS SHOW:
- Record Scenes and Takes directly onto the Renommee harddrive ( Note: select Project 1 for daily newscasts)
- Read prepared script from Teleprompter
- Use Slate Marker to identify Scenes and Takes
- Use Renommee Split function to select scenes for broadcast
- Trim selected scenes using Audio Scrub and ADD scenes to Storyboard
- ADD beginning and ending Animation scenes to Storyboard (Note: These scenes are archived in Project 10. Use Clipboard function to retrieve and add to Newscast Project)
- Apply Post-Production effects, e.g., Transitions between scenes, Titles and Voiceover narration.
- Play Storyboard
- Make any necessary changes
- Set Presentation Options to counter OFF
- Broadcast News Show from Renommee Edit Screen through Switcher.
- Use Scene function to collect all Project 1 Storyboard Scenes into a single scene.
- Name new scene: D/M/Y
- Use the Clipboard to transfer scene to Newscast Archive Project (Project 10)
- Delete Newscast Project (Project 1)
HANDS-ON EXERCISES
- Video editing on the Casablanca Renommee
- Studio Setup and Operation Exercises:
- Setup 3-Point Lighting
- White Balance Teleprompter Camcorder
- Warming Cards
- Setup Background Chromakey Lighting
- Adjust Microphone output Levels
- Enter Script into Teleprompter Software
- Work with Video Switcher
- Setup Picture-in-Picture Effect
- Setup Chromakey Effect.
- Produce, Edit and Broadcast a News Show
Call 1-800-221-6322 to discuss details.